

This layout was created for an a-z challenge. Z is for zentangling. this is all hand drawn, so it took a while! I thought I'd share the process, so hunker down, this is a looong post.

Step 1 was to mark out the page in pencil. I went for a border first, to give the page a definite ending. I chose and trimmed a photo, backed it in black card and measured it. Then I drew a box to fit it in the centre of the page and pencilled in lines radiating out from that.

Nest the ink- I use a uni-pin pen. Usually in about 0.5, but I use anything from 0.2 to 0.8.

I inked in the lines using a ruler. I gave each section a border so that it has a white space to define it. I wanted each tangle pattern to stand on it's own. Not having a border makes the patterns blend together, and that wasn't what I wanted for this piece.

Now, onto the zentangling. This is really just doodling. I have my own set of patterns that I've always doodled, and I've learned many more via the hundreds of amazing tanglers out there who share their patterns. If you want to have a go, just google zentangling, you'll find lots of guidance, step by step guides to producing patterns,and oodles of inspiration.

I go for whatever comes into my head. My bubbles always come out, and I love the regular patterns that i can get into a rhythm to produce.

Here's the page with the mains sections all inked, before the shading. Shading wasn't something I did to start with, but it really makes the patterns pop off the page.

The photo above is an example of how shading changes the pattern. the zig zag on the left is shaded, the one on the right isn't.

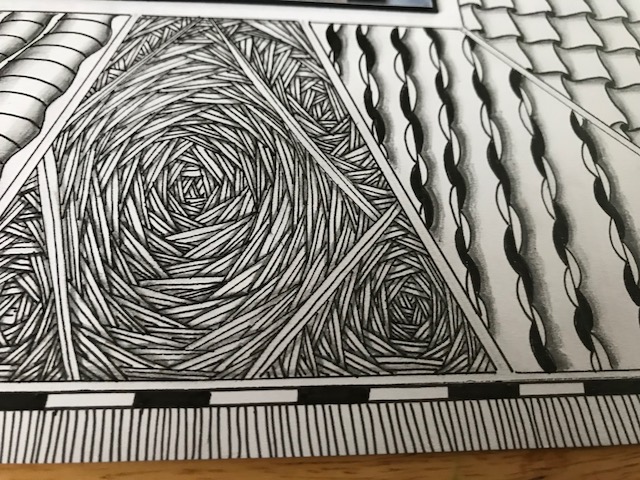
This is my favourite pattern to create. It takes forever, but it's so relaxing to do. Shading it gives it depth, but oh my, it took a long time!

Even a tiny bit of shading on each circle makes a difference. I used a B grade pencil, and a top tip is to rest your hand on a scrap piece of paper, otherwise you'll smudge the areas you've already shaded. If that happens, just get an eraser out!

Shading completed!

The final bit of inking was to create a border I drew the horizontal lines for the black and white border lines with a ruler. Then my favourite border- the hundreds of little lines to look like a fringe. I loooove drawing those lines!


And the final page again, with picture in place.

Oh my word, I just mistakenly deleted the whole post! Thank goodness for the undo button.
Thanks for looking!
No comments:
Post a Comment
Thanks for commenting!